
No Sew DIY Fabric Cabinet Doors That Hide Clutter in Style

We’ve been plugging away on our laundry room makeover and I’m so excited with how it’s coming along.
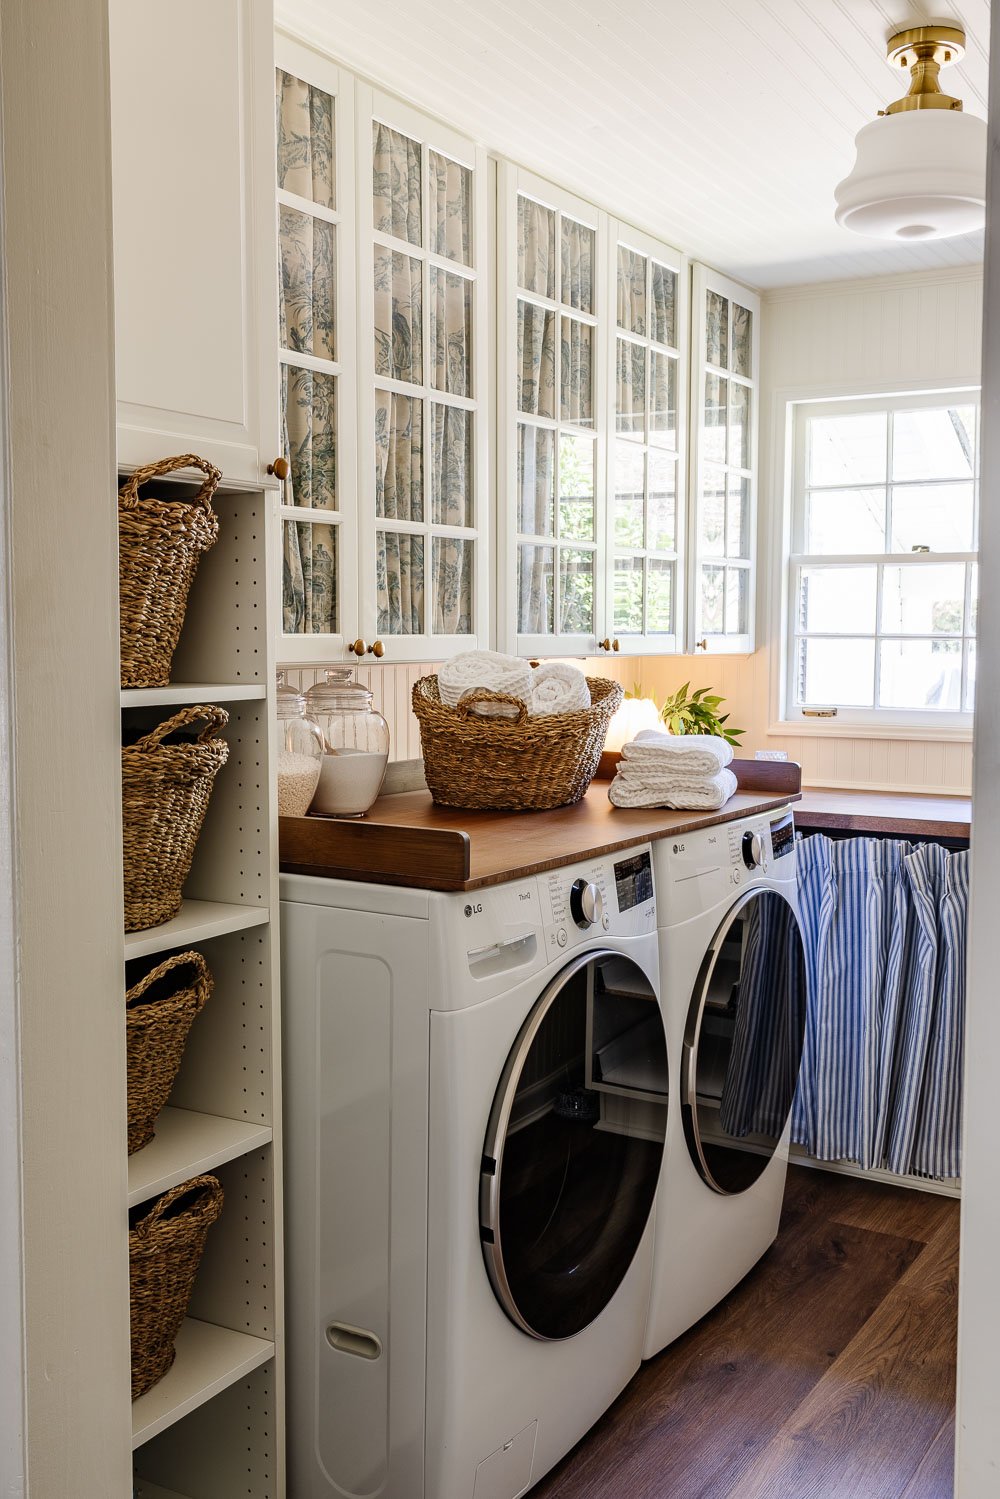
Between reworking the layout, installing beadboard on the walls, laying down Stainmaster luxury vinyl plank flooring in Olympia Oak, and putting in new IKEA cabinets, this room is really starting to feel intentional.
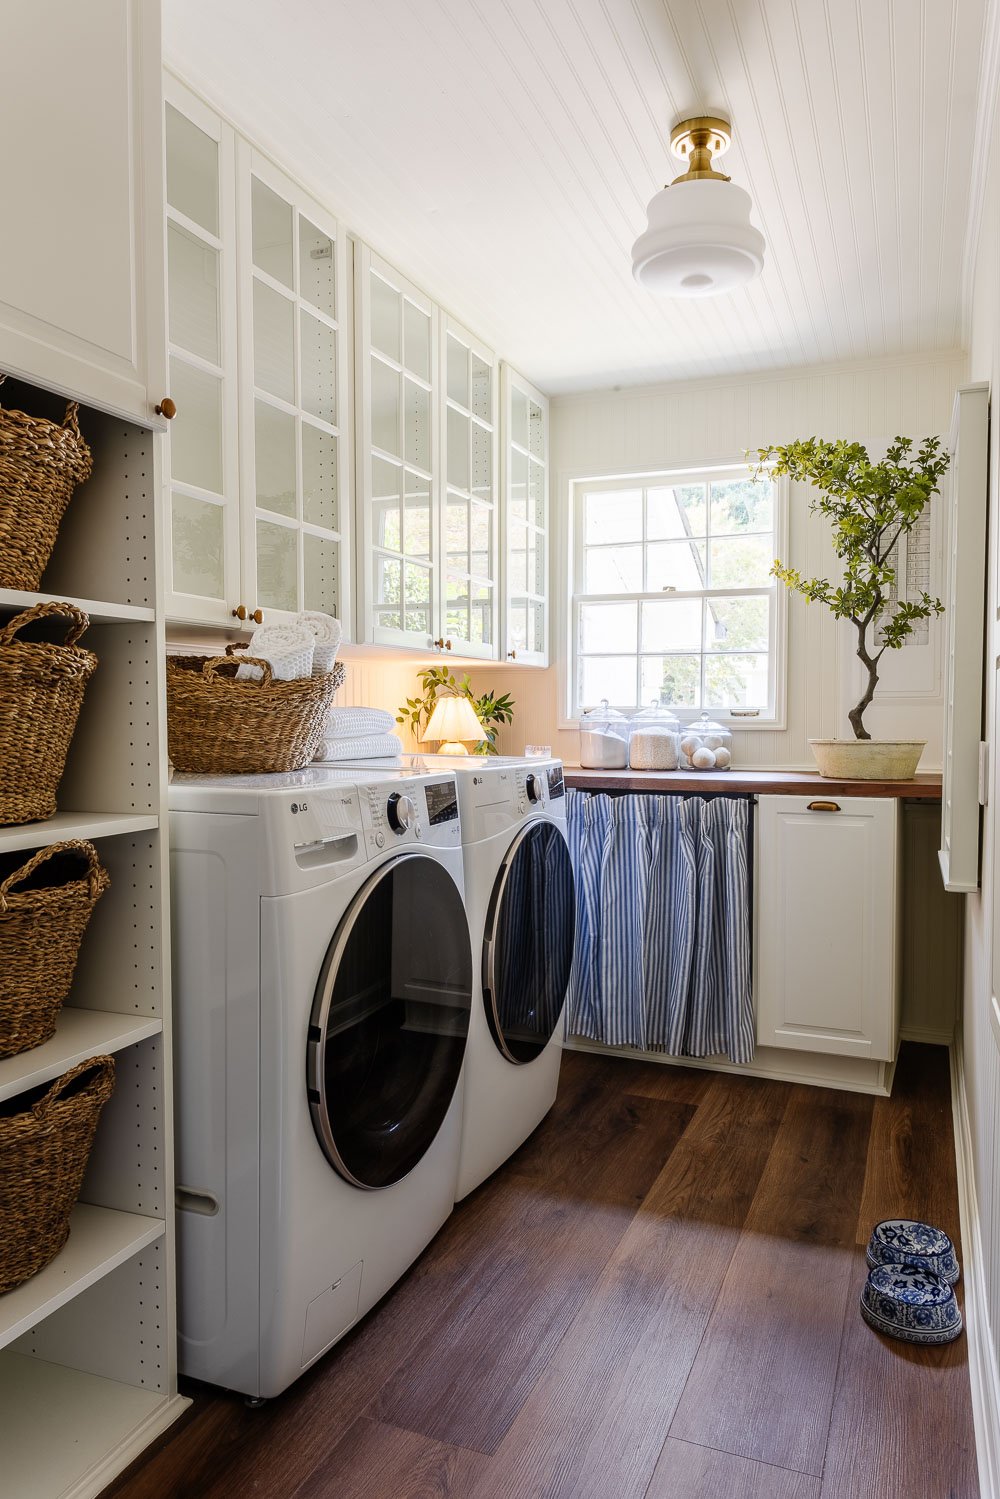
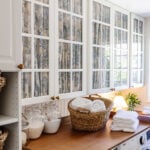
The glass doors on the upper cabinets were a must for me. I love the airy, open feel, but I also knew we’d want a way to disguise clutter when necessary. Cue this fun little vintage trick: adding cabinet fabric panels behind the glass.
Related: How to Cover Glass Doors With Window Film
As an Amazon Associate, I earn from qualifying purchases. full disclosure
Why We Did This (and Why You Might Love It Too)
Before we get to steps, here’s why this trick is my favorite:
- It hides clutter behind glass without losing the visual lightness of glass doors.
- You gain the ability to swap fabrics when your mood or style changes.
- It adds pattern, color, and character to what otherwise might be a very plain wall of cabinets.
- It’s fairly simple, doesn’t require removing the glass, and is easily reversible.

Related: DIY Glass Closet Door Makeover With Antique Mirror Film
What You’ll Need
Here’s a working materials list (you may find equivalents depending on what you already own):
Step-by-Step: Making Your Own Glass + Fabric Cabinet Panels
Here’s how we did ours in our laundry room, step by step.
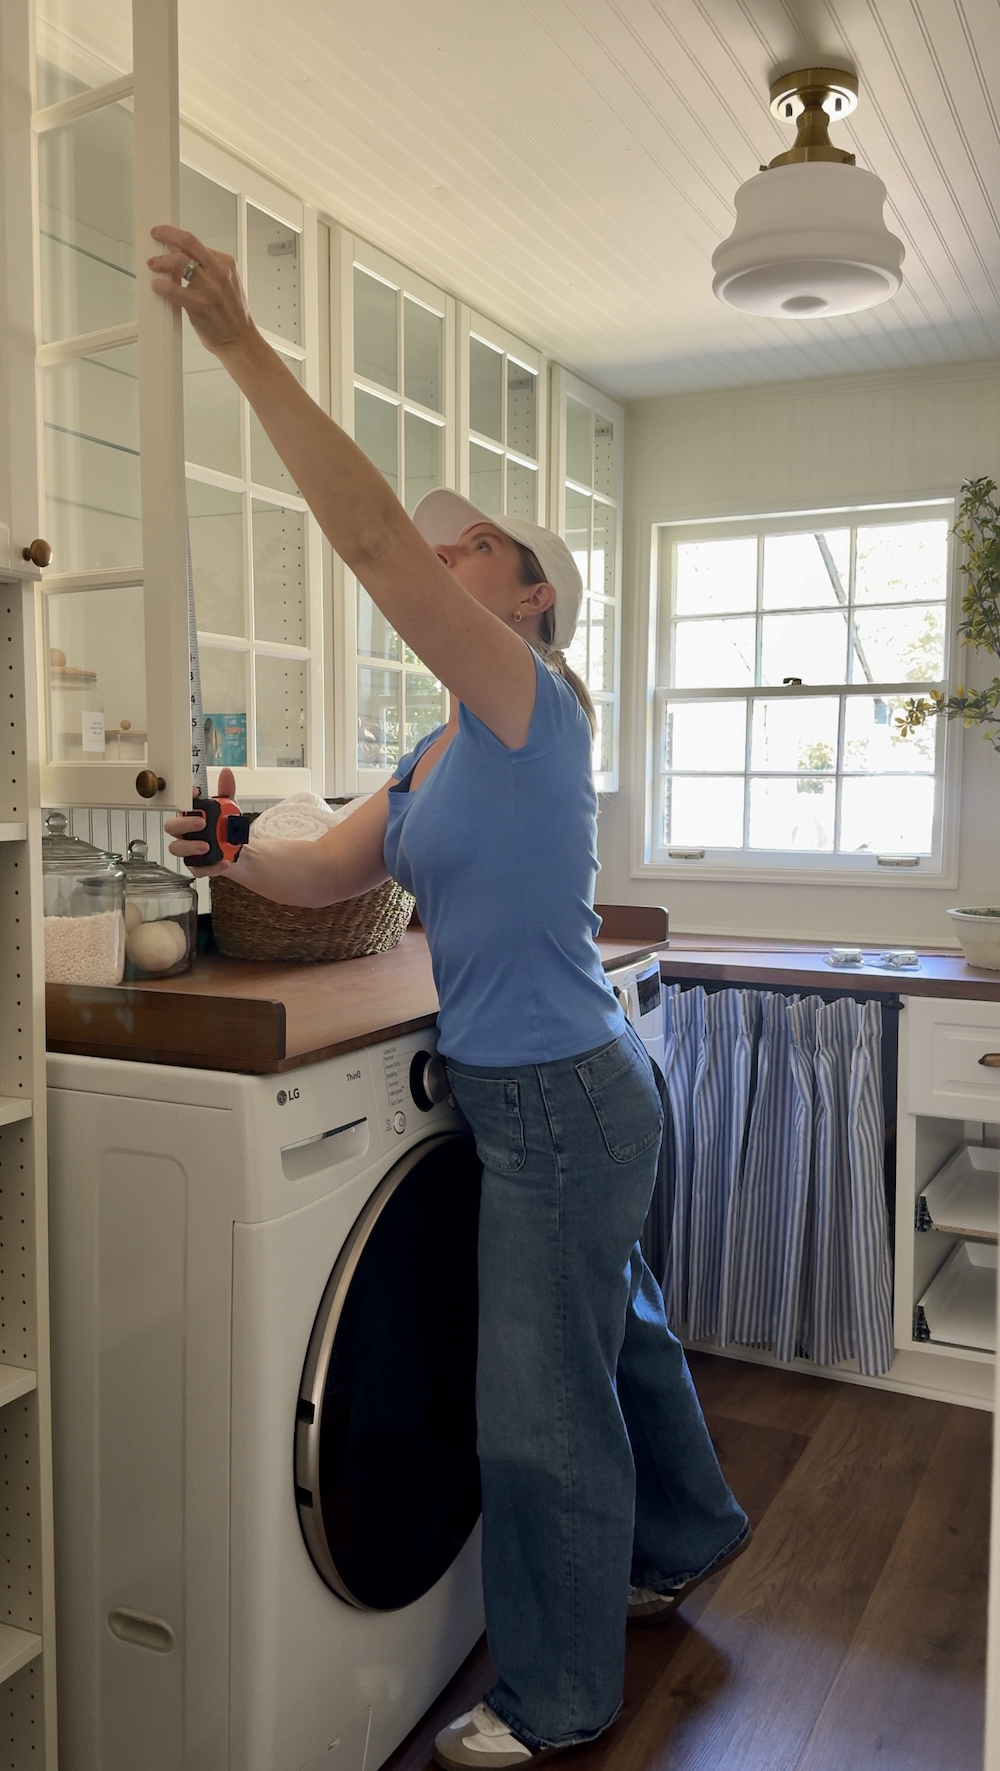
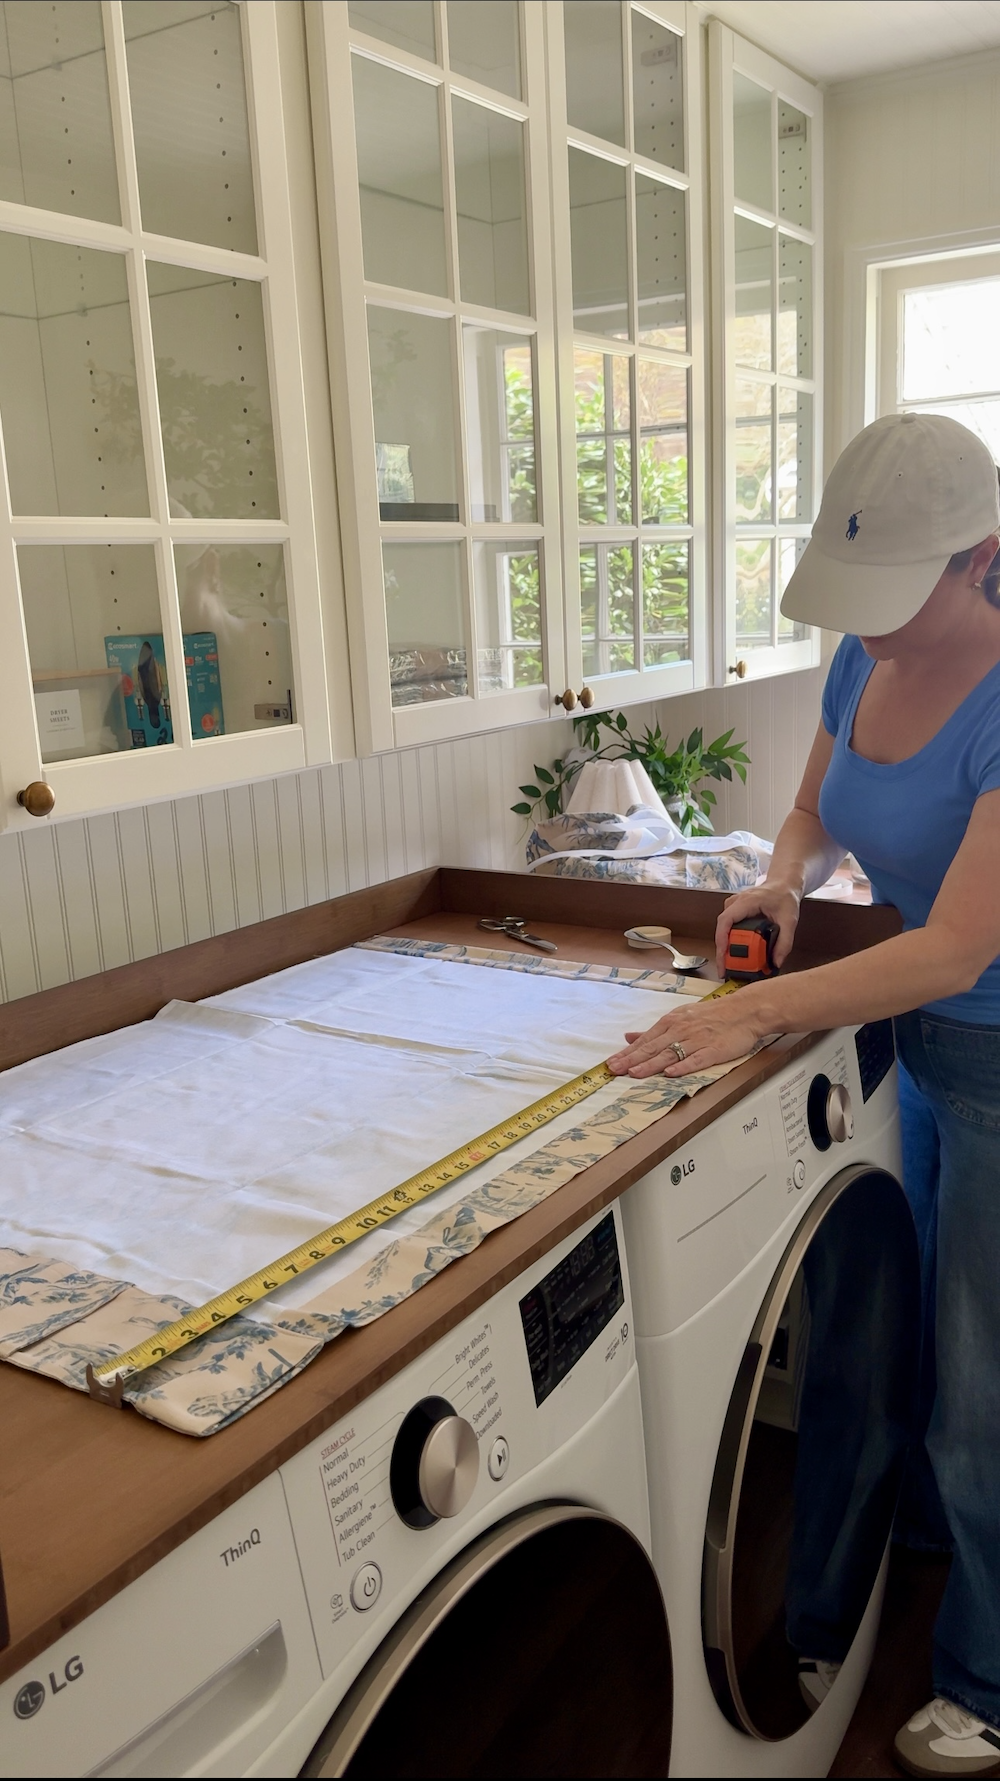
Step 1: Measure the existing glass opening
Measure the visible glass area, then plan your curtain to extend past the glass on all four sides by about 1 1/2″ so the dowels are hidden when the door is shut. For width, multiply your finished width by 1.5–2× for soft gathers.
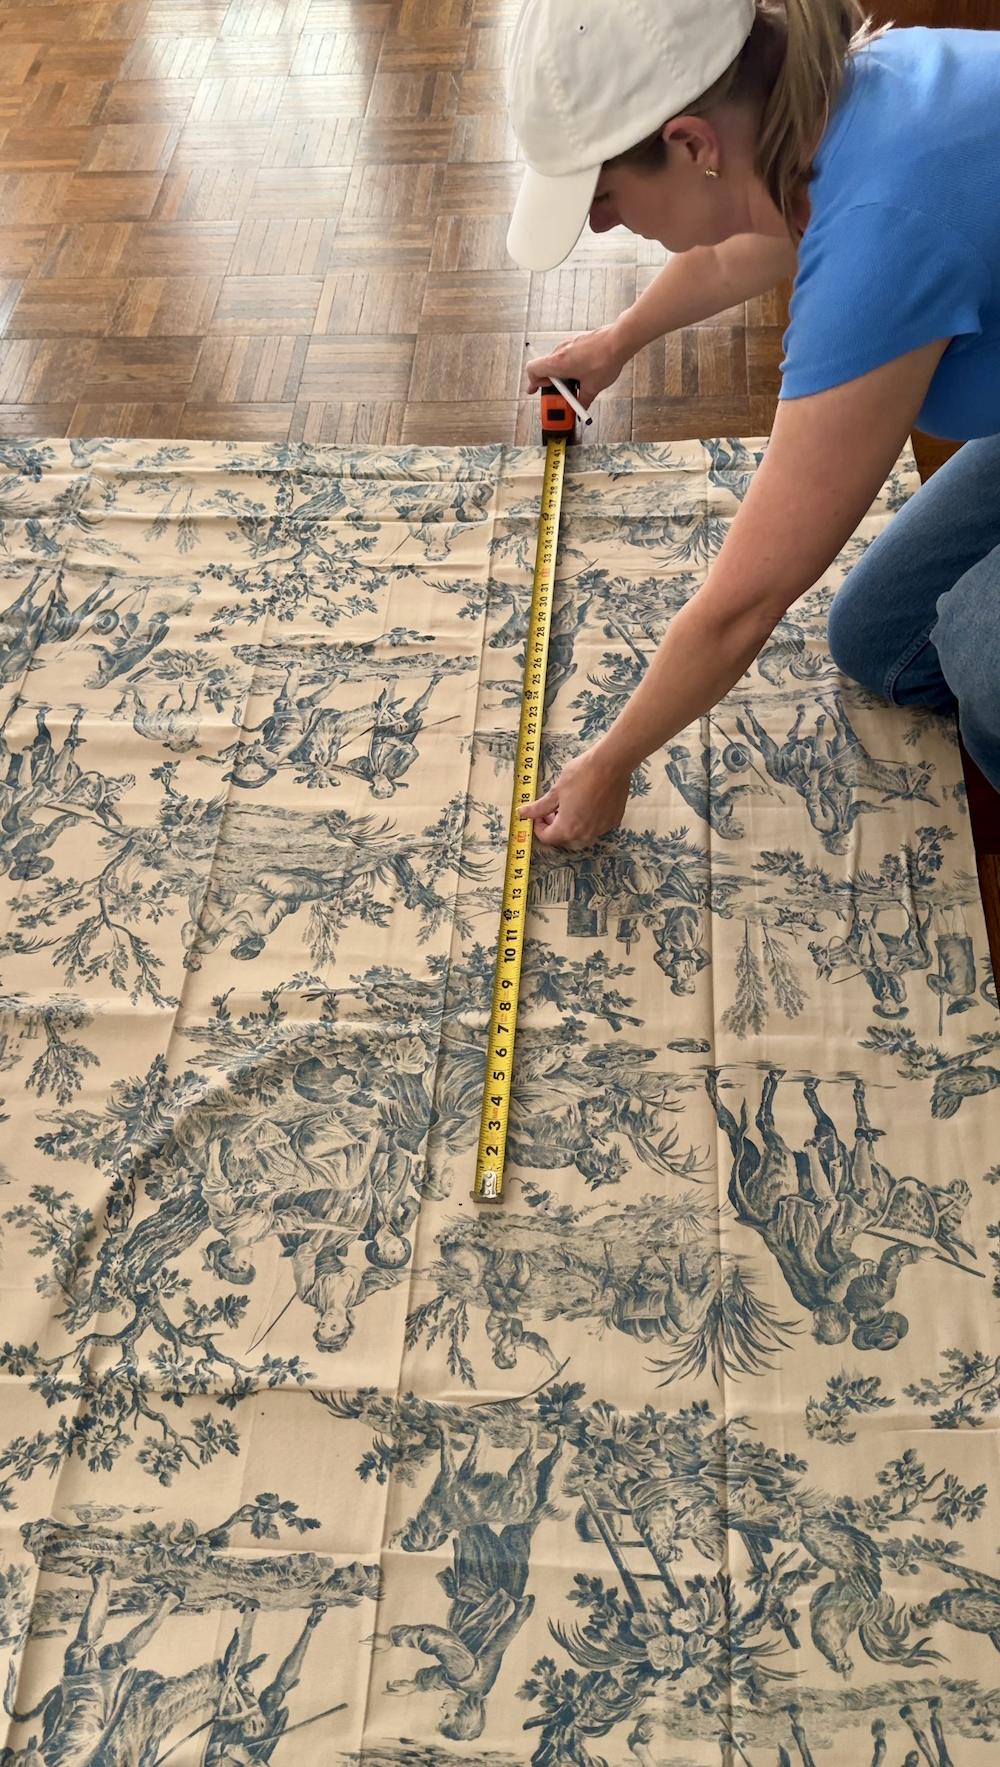
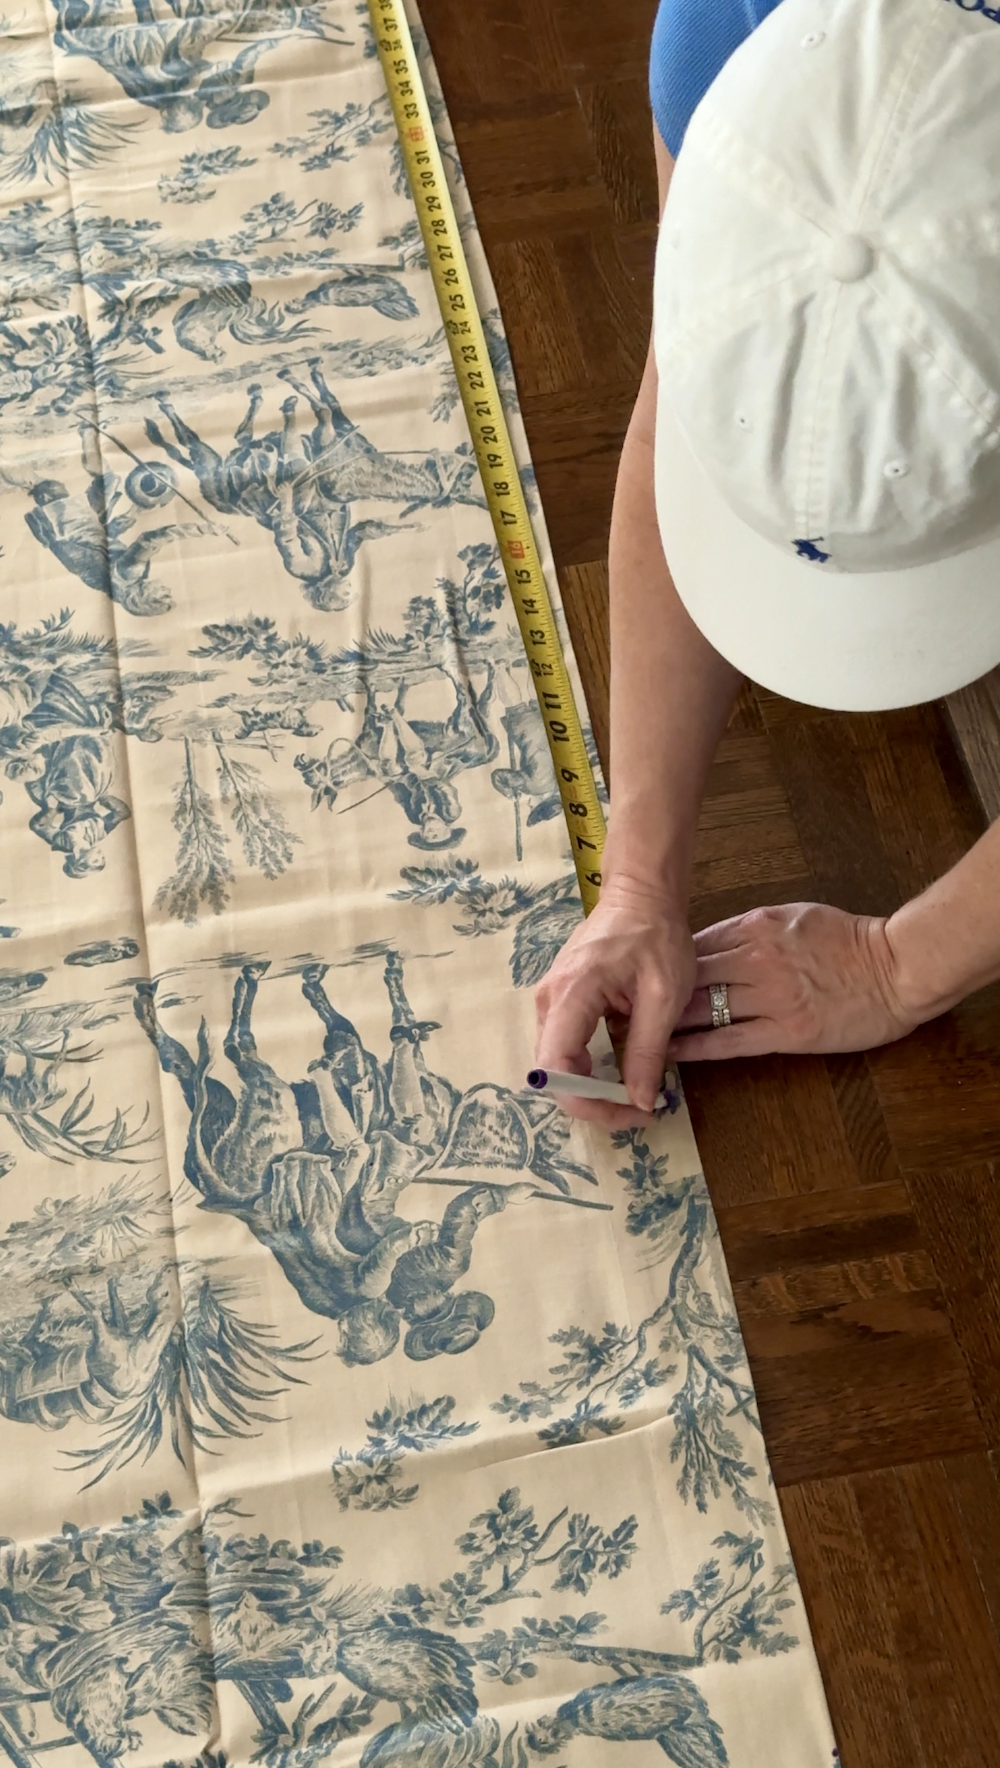
Example: a 16″ finished width becomes 24-32″ cut width.
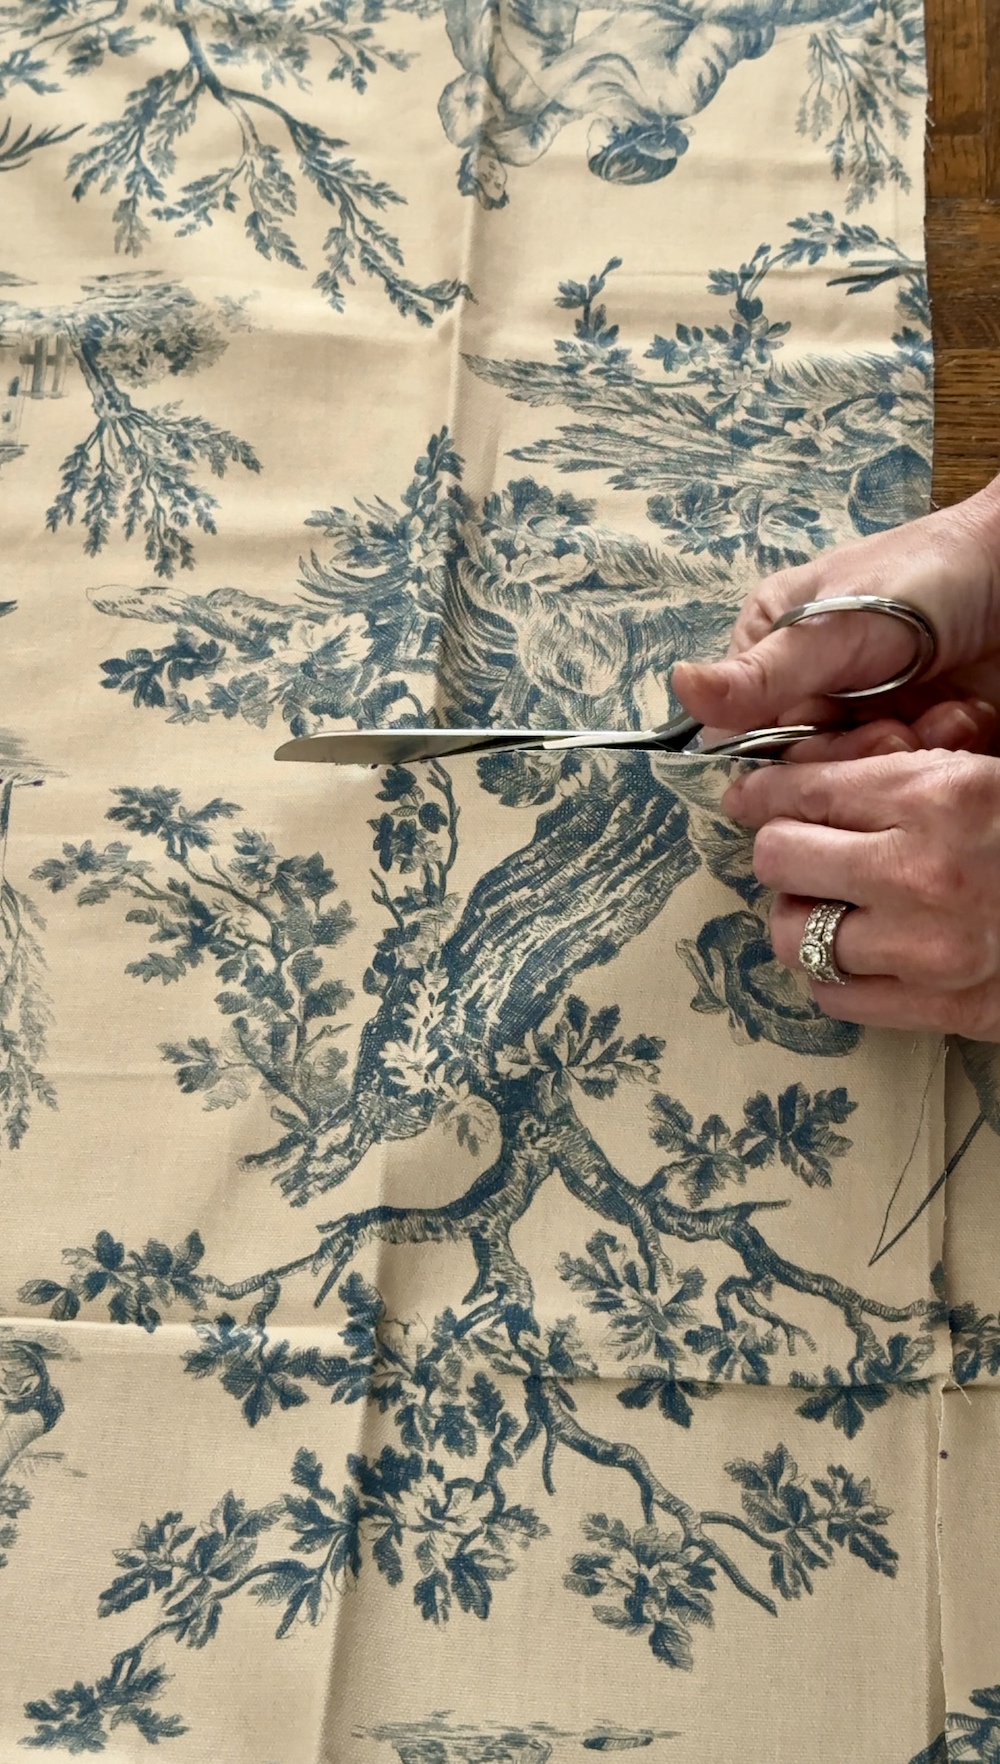
Cut your fabric into a single long panel to fit your cabinet door. Be sure your cut size includes:
- The finished dimensions (glass size 1 1/2″ beyond on all sides), and
- Extra for seams and the top/bottom channels (plan 1 1/2″ each)
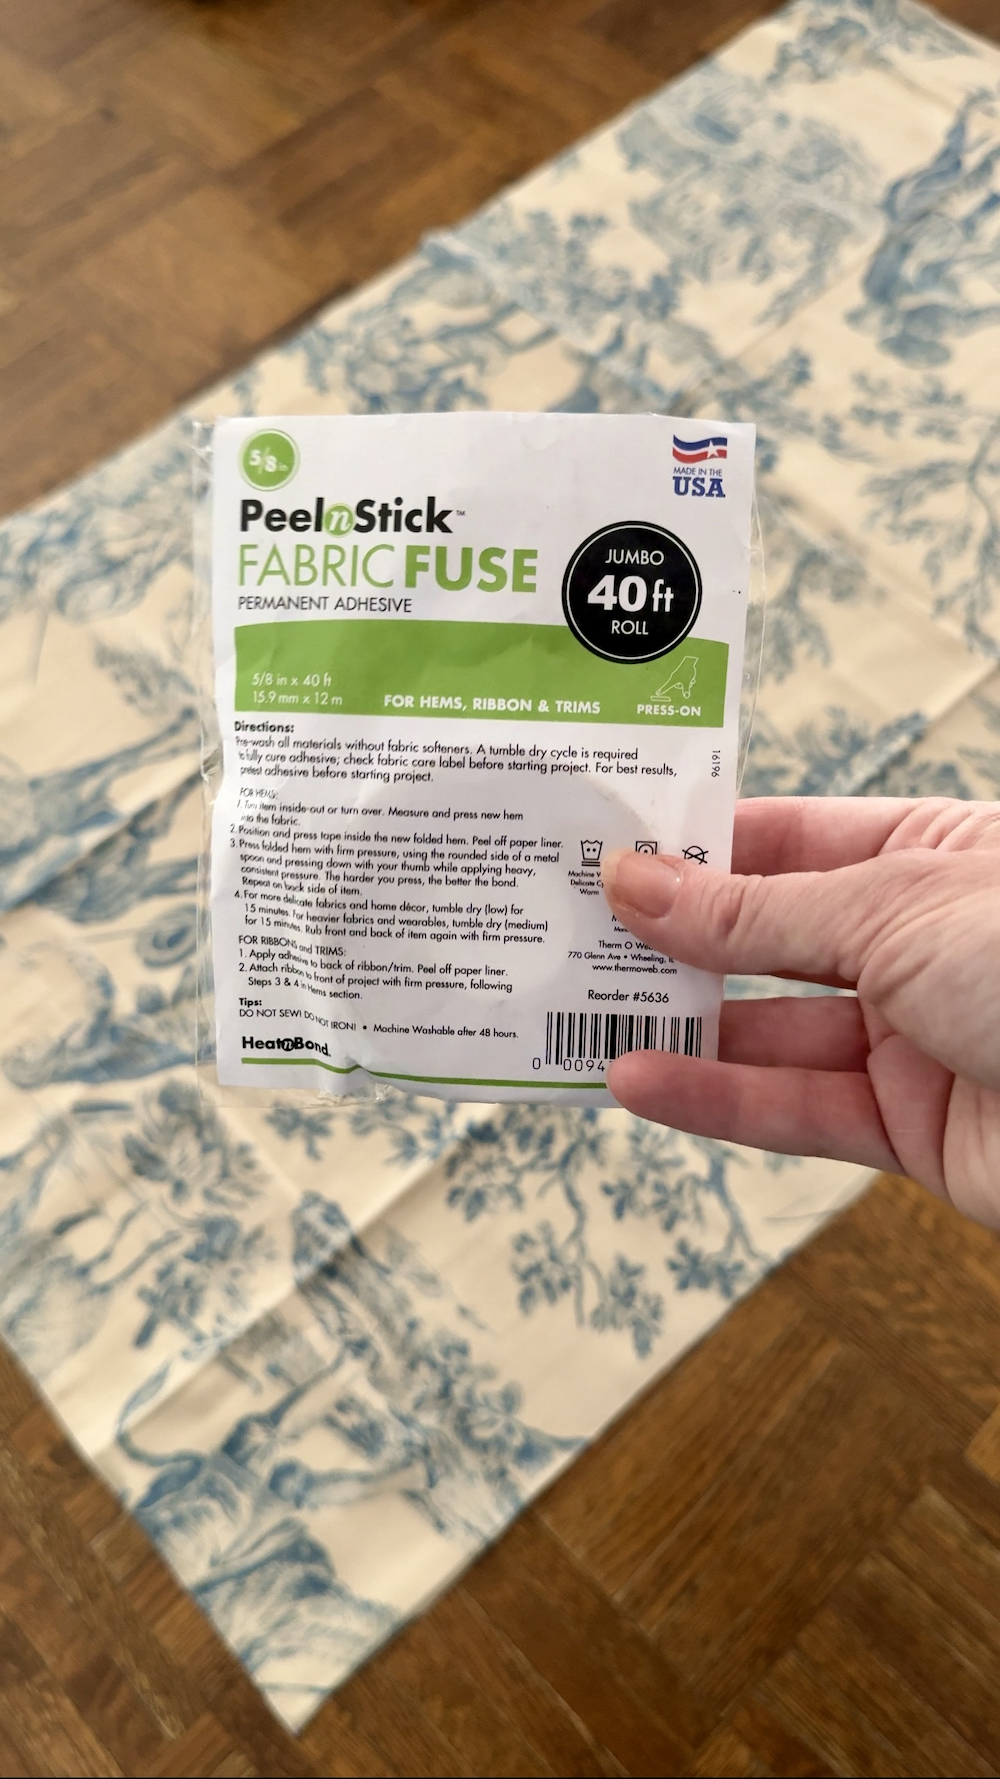
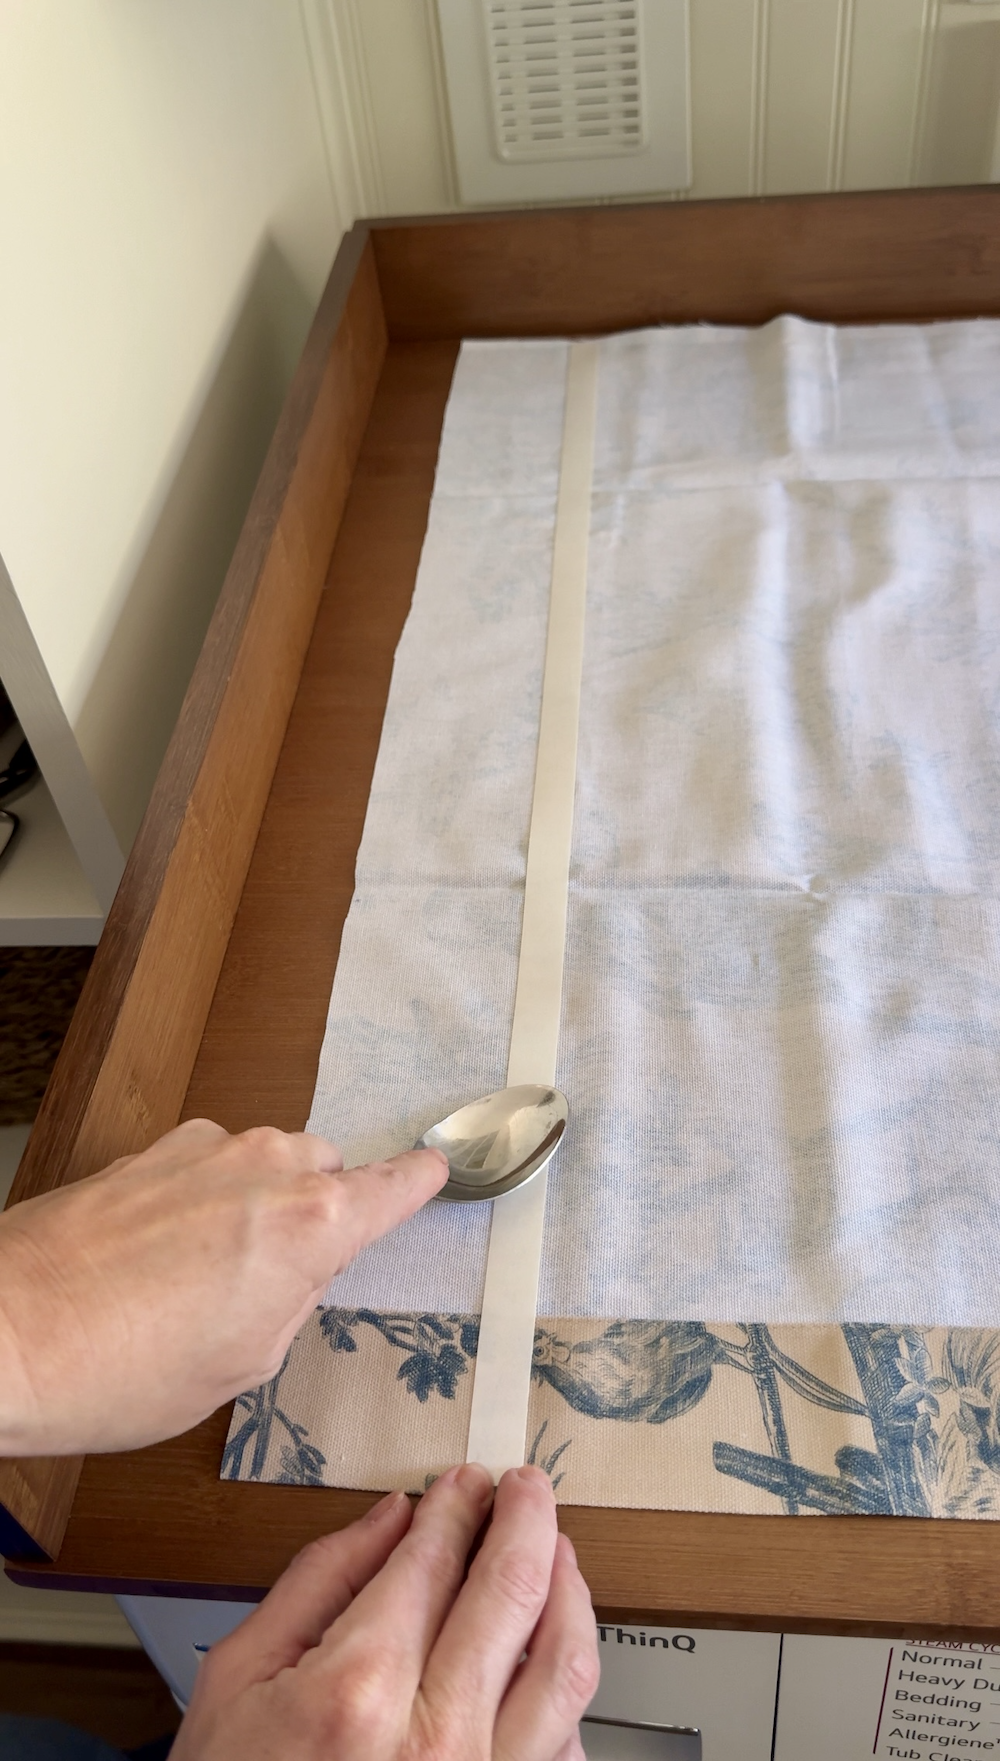
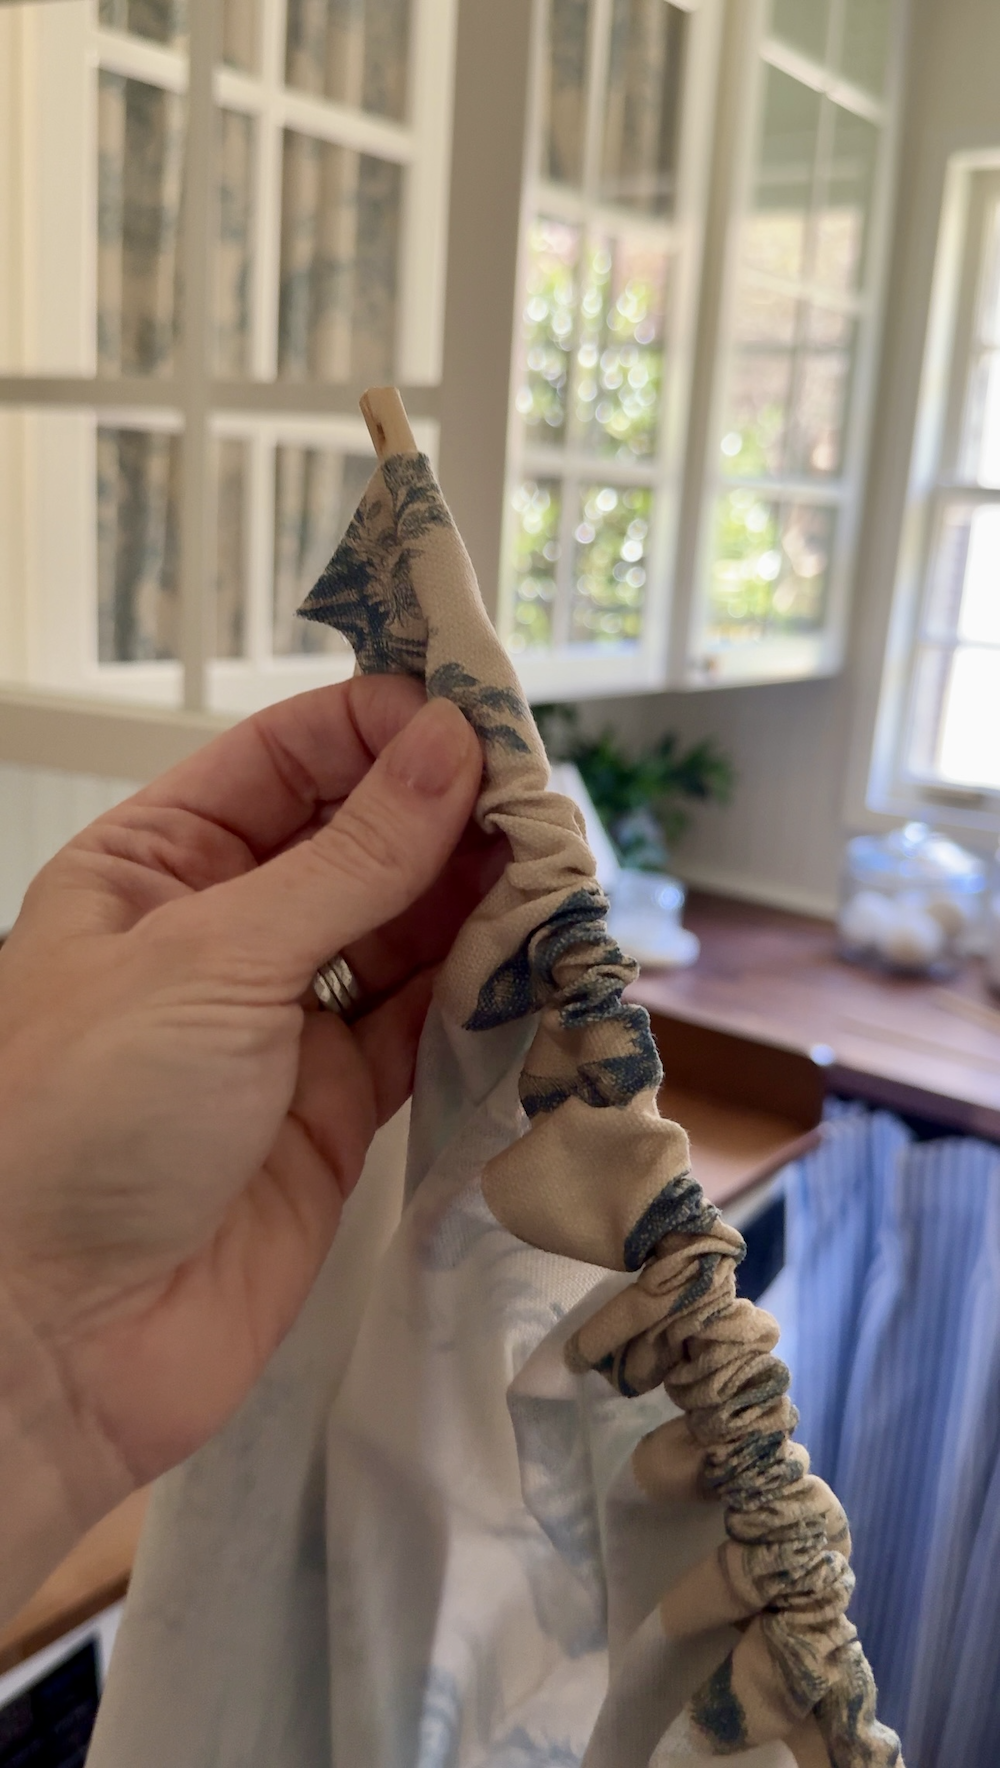
Step 3: Hem (fold and press) the sides
Finish the two long side edges first: Fold under ~¾″ and bond with the fabric fuse tape per package directions. Use the metal spoon to firmly press the tape into place to bond it to the fabric.
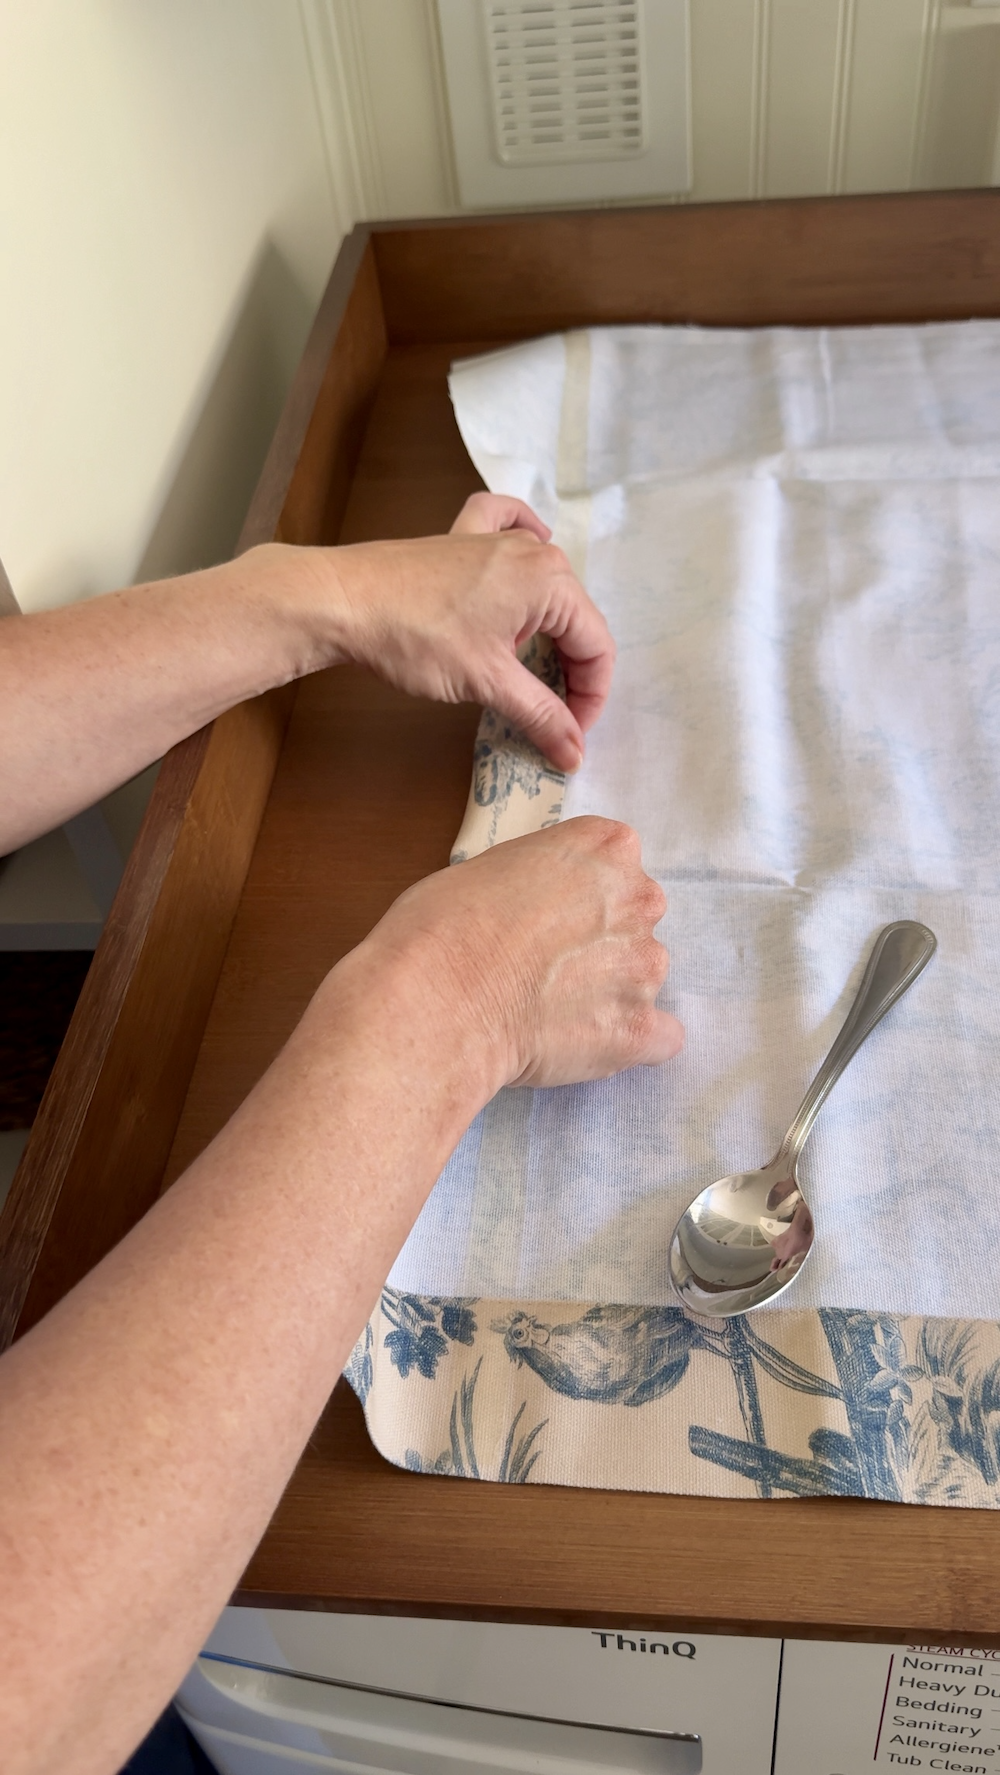
Step 4: Make the dowel channels (top and bottom)
Create a neat channel at the top and bottom of the fabric panel: Fold ½″, then another 1″ and fuse with fabric fuse tape to form a sleeve.
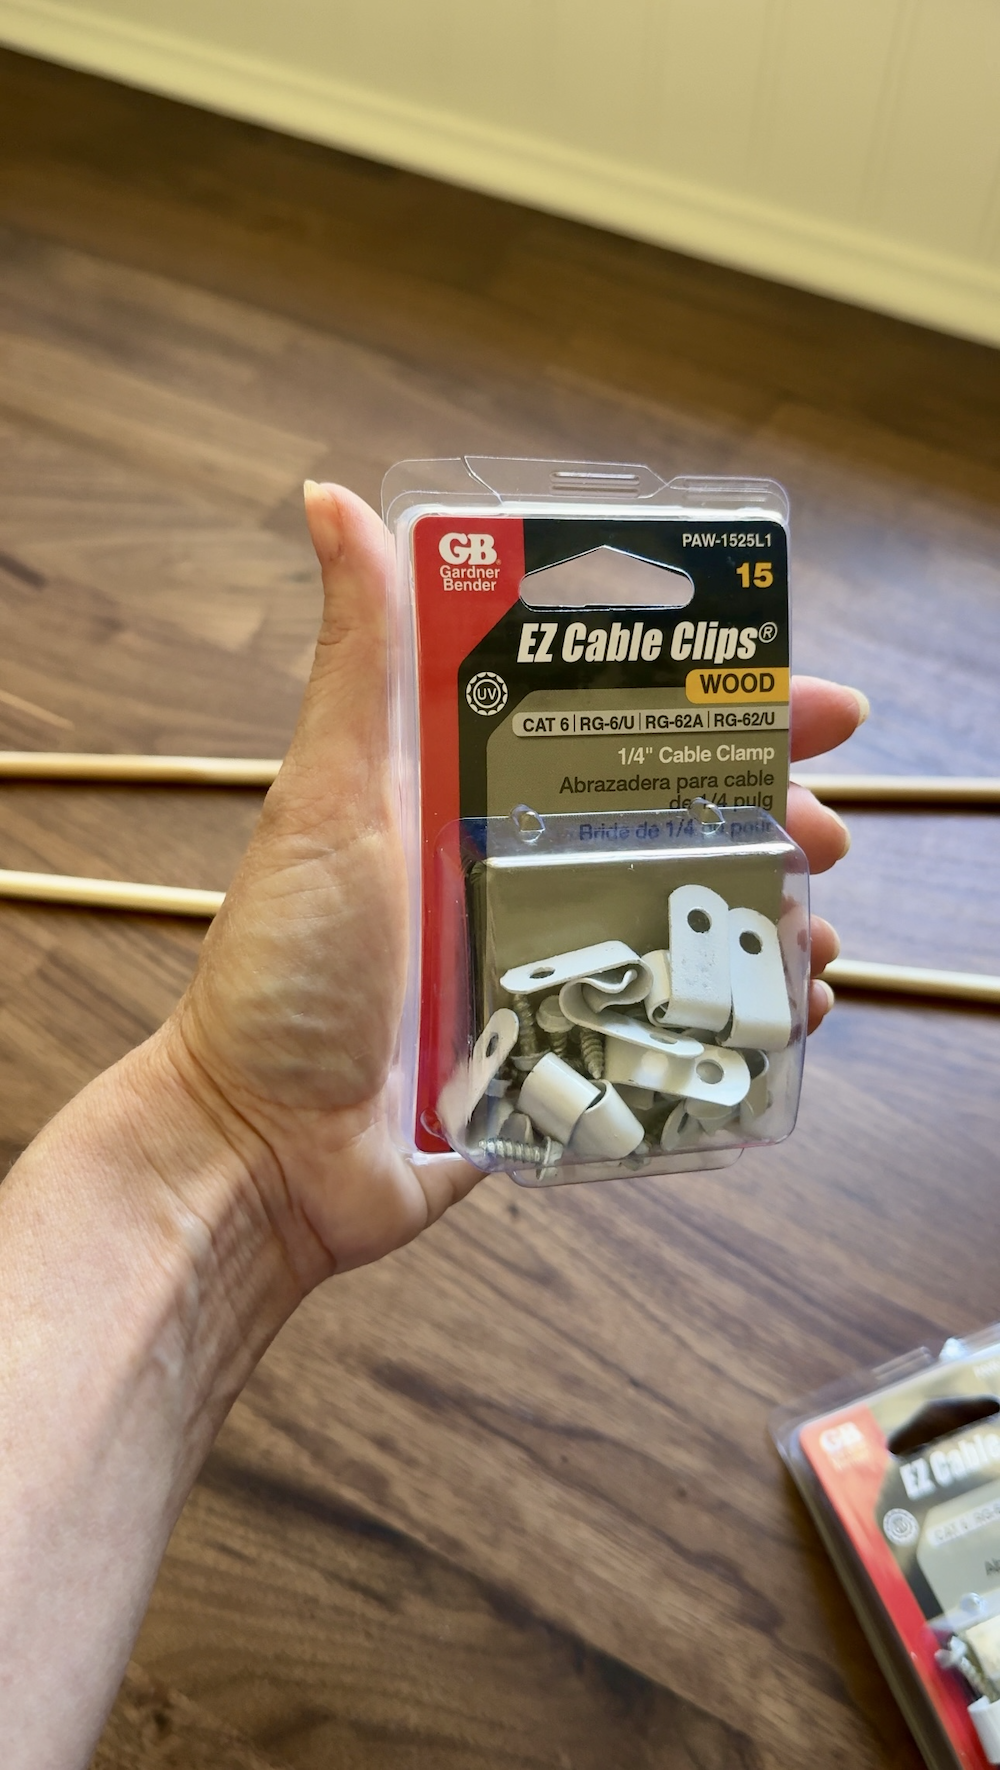
Step 5: Place your cable clips inside the door frame
Open the cabinet and mark cable clip locations the same distance away from the glass as your planned fabric overhang (ex: if you extended the curtain 1 1/2″ past the glass, place the clips 1 1/2″ from the glass).
Pre-drill tiny pilot holes and screw in the cable clips at the very top and very bottom inside the wood frame. (If your frame won’t take screws, use a narrow tension rod instead.)
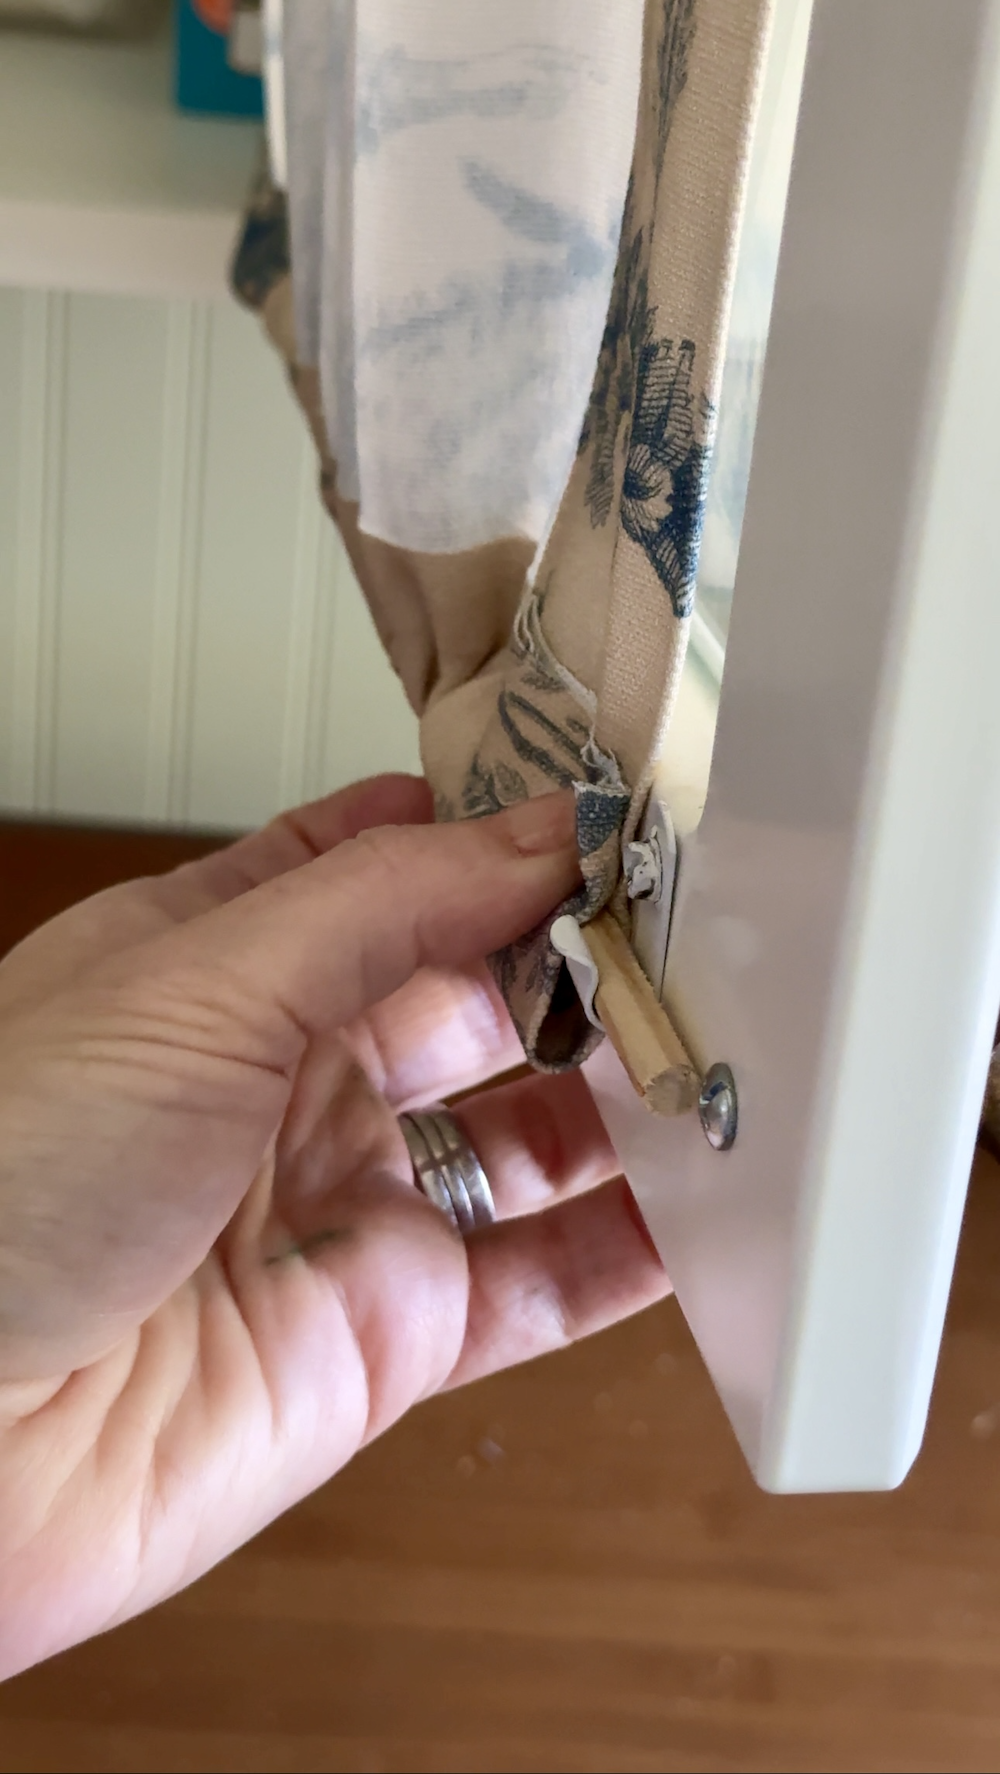
Step 6: Slide the fabric panel into the cabinet door frame
- Gently slide the top dowel (or top hem edge) into the top retaining channel behind the wood frame.
- Then lower the rest of the panel down into the frame, adjusting so the sides and bottom align.
- For the bottom dowel, slide it into the bottom channel as well.
Step 7: Adjust Fabric
- Check that your fabric edge is not pinched or dented by the clips.
- At this stage, adjust tension, flatten any wrinkles, and confirm full coverage.

Step 8: Fine-tune & trim excess
- If you see small puckers or rolls, ease them out by loosening the dowel or shifting the panel slightly.
- Trim any excess fabric within the frame that might peek out when the door is open
- Close the door gently and inspect from different angles. You want even tension and no sagging.
Step 9: Repeat for all glass doors and step back to admire!
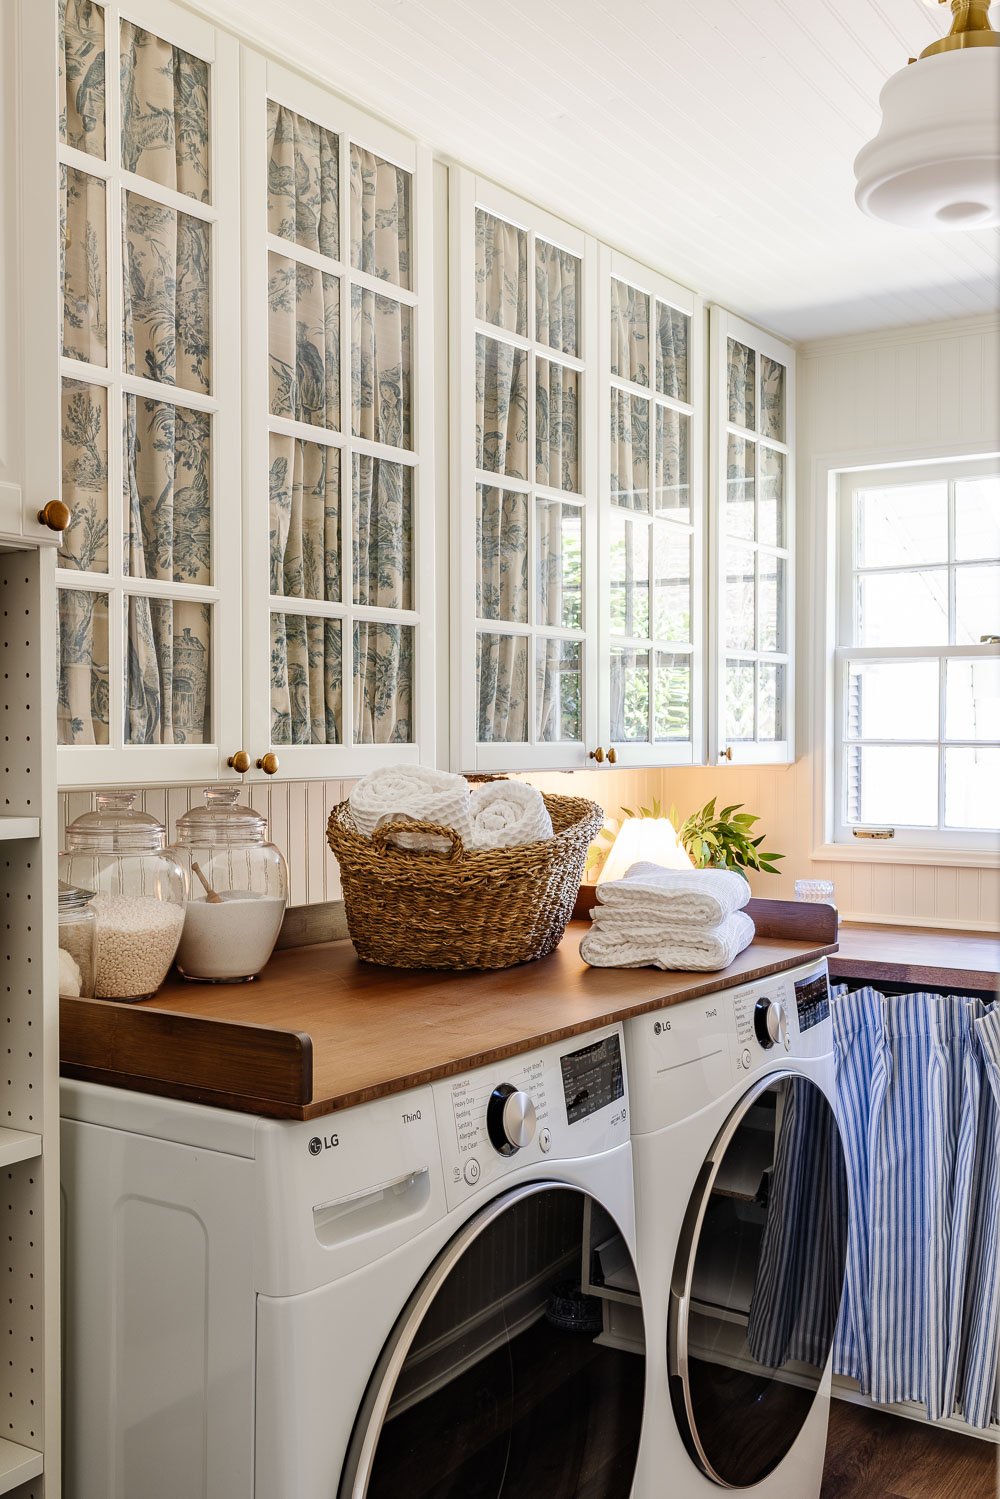
Once you do one, the rest go faster. I took special care in our laundry room to match the pattern alignment and spacing so the whole wall feels cohesive.
It’s not totally perfect. I’m certainly no seamstress. But I think its imperfection is part of the charm.
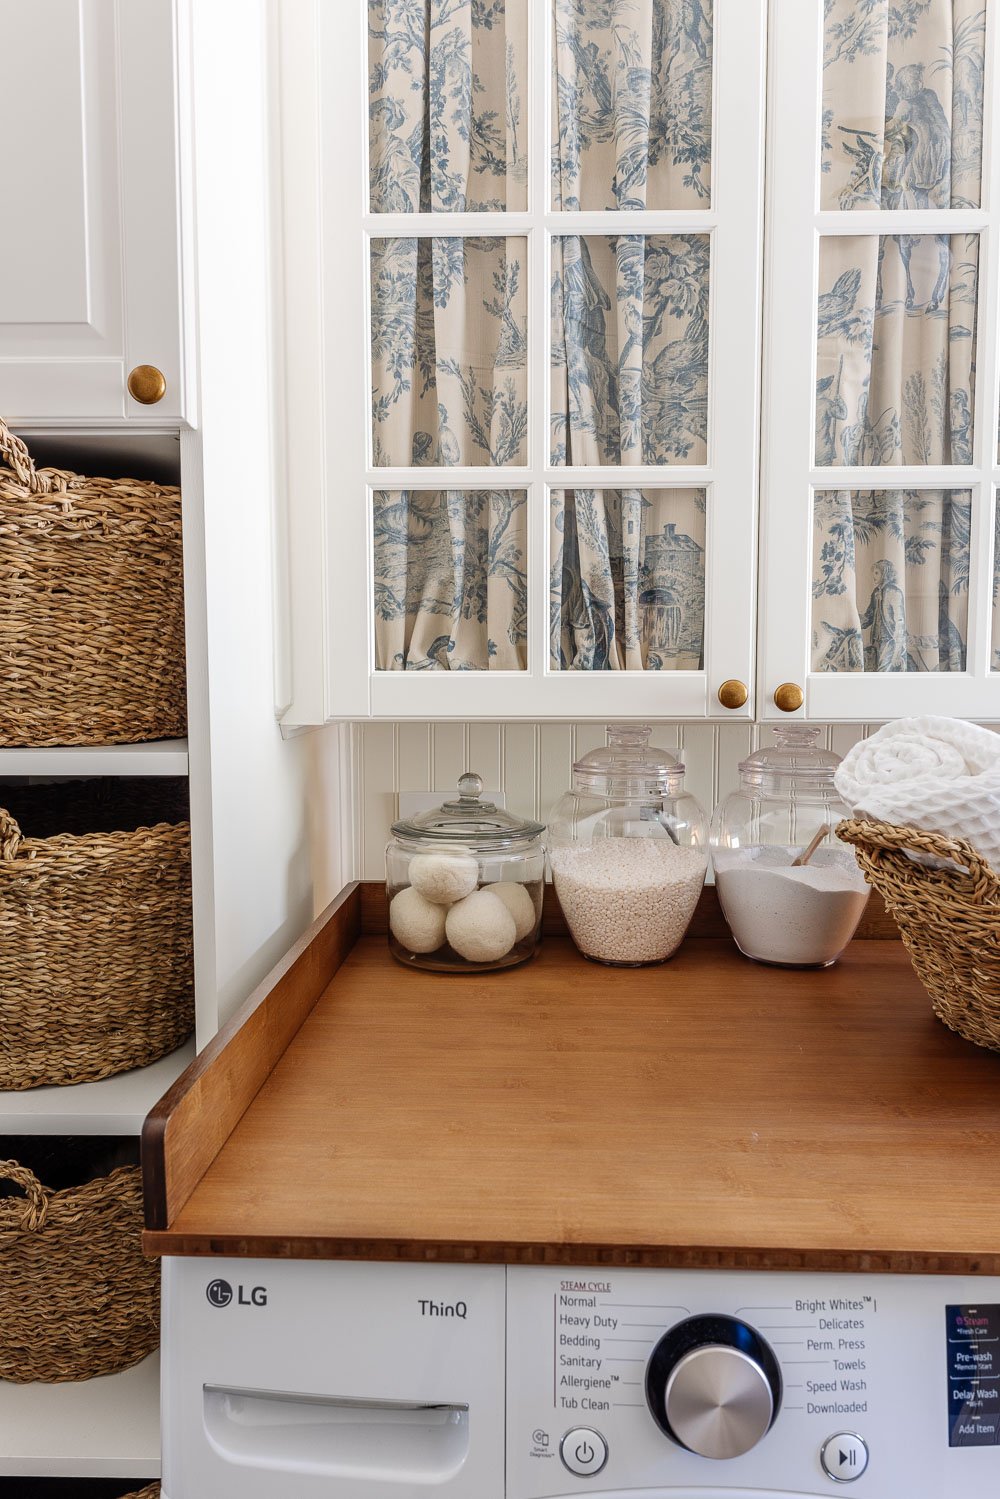
We added this removable countertop and acrylic jars for detergent so now it’s looking even better AND is more functional.
Tips + Troubleshooting
- Choose the right fabric. Heavier fabrics will show texture and drape beautifully, but very thick ones may not slide easily in the frame.
- Be gentle with clips. You don’t want to damage your fabric edges or break your cabinet door.
- Leave a tiny gap. About ⅛″ clearance helps avoid friction.
- Test before final trimming. Live with the panel for a day or two and see how it behaves before cutting edges or locking everything tight.
- If you can’t fit dowels or rods, a simpler method is to affix small strips of self-adhesive Velcro to the inside frame and to the back of the fabric, so the panel just “sticks” in place. (It’s reversible and easy, but gives you less tension control.)
How It Played Out in Our Laundry Room
In our laundry space, after installing beadboard and laying the Stainmaster Olympia Oak vinyl plank flooring, the white IKEA cabinets felt almost too crisp and flat. The glass doors brought in a bit of visual interest, but I definitely knew I’d want an “off switch” for clutter.
This DIY cabinet fabric method gave us the control: all the charm of glass doors plus the flexibility to hide what’s behind. The first panel took maybe an 20 minutes (hemming, measuring, trial sliding), but the rest went faster.
Now when I open the laundry room door and see that wall of cabinets, it has personality with subtle texture and pattern instead of feeling sterile.
Also: because it’s totally reversible, if one day I want clear glass everywhere, I just pull out the fabric and it’s back to default.
Blue Toile Fabric | Removable Countertop | Ticking Stripe Curtain | Detergent Jars | Baskets | Mini Lamp | Light Fixture | Waffle Towels | LVP Flooring
It gives me peace knowing that even when I’m not perfectly organized, the eyesore is gently masked.
If you try this, I’d love to hear how your fabric choice turned out or see a photo!
More DIY No Sew Project Ideas
